September 20, 2011

Desking it Out

by Cait

Yes, the title is a terrible pun.

As I mentioned, we’ve been working on the Closet Office recently. In the photos above you’ll notice the desk surface we were working with was quite small (the desk was about 47 inches but the workable space was about 25 inches, with space behind the left monitor for cables, a lamp, etc). We increased our desk to a 96 in long surface, which allows the monitors to be placed side by side instead of at an angle to each other.

I’d like to take a second to say thank you for all your color suggestions on the last post! It was so fun to read your opinions. We really planned on going with Spun Honey or Churchill Hotel Hazy Yellow, but a trip to Lowe’s changed our minds. I don’t have any pictures for you just yet (the computer with Photoshop is still disconnected), but I updated our Paint Colors graphic (that’s a new section filed under Source List, but the blog re-org is another story).

You’ll notice that it’s quite different the general trend we started with the other colors in our house, but we were in Lowe’s buying supplies for the desk surface and scored a $3 pint of Valspar’s Deep Peri (from the Waverly line). It was a spur-of-the-moment choice to buy the can, and we ultimately decided to go ahead use it instead of going with a “safer” option like one of our already-owned colors. It’s definitely bold. A take-your-breath-away kind of bold. But we think we like it. (Kind of shocking, right?) Fortunately it’s only paint, so if we end up hating the choice we still have our already-owned options.

I also wanted to mention some of the ideas we’re thinking about for organization.

source

I saw this post on Unplggd a while back, which led me to the above photo, where Rasterboy cut a Ribba picture ledge in half and combined it with an Ekby Tony shelf to create a monitor riser. I think we can create something similar without trekking down to Ikea (which is about 2 hours away).

source

I can’t remember how I ran across this sold-long-ago Etsy listing, but I love it! Here’s hoping we can rig up something similar.

source

I ran across this desk on Pinterest fairly recently, and I can’t stop thinking about what a lovely stain it is. I think I remember reading that she used driftwood stain, but now I can’t find where I read it. While we were at Lowe’s I saw a Sunbleached stain by Rust-Oleum, but I was worried the color wouldn’t look right with the wall color we used. We ended up just oiling our desktop, but I’m thinking maybe we will sand it down and gray things up a bit if we decide we don’t love the natural look.

source

Our closet opening is just the right size that we may be able to to mount an Ekby Alex drawer unit beneath the desk surface (unless we dedide it would take up too much knee room).

In addition to the Alex, we want to add a couple of chunky white shelves above our computer monitors. We will probably use this method as laid out by Emily of Merrypad.

Just a few of the office-related things on my mind today. Anyone else working on a office update? Shocked we went with such a bold color?

September 15, 2011

Colorful Additions and a Paint Question

by Cait

Complete cop out on post titles tonight. I’ll try harder next time.

Just a short post to show you the new pictures of the Art Room that I didn’t have with me when I posted earlier.

This yellow chair was picked out of the neighbors’ trash one rainy evening about a year ago. After a coat of $4 spray paint later it’s looking quite cheery.

We found this vintage pulldown map on eBay. It’s about 68×70 inches, and with shipping and the french cleats we bought to hang it the total came to about $90.

have I ever mentioned that the clock is from my childhood bedroom? it hung over the closet there, too

I forgot to mention earlier that we’re planning to change up the desk surface in the Closet Office. We were going to use a Lagan Countertop from Ikea, but the cost to drive to the closest Ikea plus that of the counter itself comes to about $100, and that’s just not feasible right now. Fortunately we have quite a few more of the 50 cent Ikea L-brackets we used for the current desk surface, so we are plotting cheaper options for a new. longer desk.

Otherwise, the only real plan we have is to paint the closet before installing the new desk. We have about half a gallon of the same color we painted the hallway (Valspar’s Churchill Hotel Hazy Yellow), and most of a gallon of mossy-green Oops paint. Other ideas we have kicked around are terracotta red, navy, gray. The conservative (and cheap) side of me says to use the paint from the hallway, especially with all the other bold things in the room. The impromptu poll I conducted on Twitter voted navy, but I don’t know how that would look with the blue walls everywhere else in the room. There are 10 paint chips over the monitor on the right at the moment, and I can’t pick.

Anyone have any ideas about closet colors? Desk options? I’m tempted to just go the cheap route and use the hallway color and construct a desk from all the scrap wood we have hanging around.

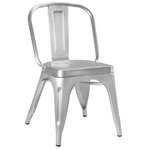
PS- I still owe you an updated design board, but Robert should be home from class soon. Maybe I’ll have knock-off Emeco chair pictures and a design board tomorrow.

September 15, 2011

The Room With All the Art

by Cait

Wow, thanks for all the sweet comments on the last post! I guess I may have to talk about our budget more often!

I’ve had a quirky, not-everyone-will-get-it style for most of my life, possibly even before the days of reading my sister’s cast-off Seventeen magazines (the “My Room” section was always my favorite). Of course, in those days I mostly daydreamed about what my room would look like and focused on expressing my quirky side with fashion. (I use that term loosely; it involved thrift store tshirts and a lot of pining for a leather biker jacket. If I had remembered to put a zipper in my Target bag dress I’d probably have worn that, too.)

These days I’m a little more West Elm than Spencer’s Gifts or Pottery Barn Kids, and I no longer want to paint clouds on my ceiling, but the soft spot for rustic & quirky mixed with bright colors remains. I’m beginning to realize that our style is probably best described as eBay Chic, or Rustic & Repurposed. I know it’s en vogue now to decorate in what people call the “collected” look, but around our house we just call it “buy what you love” and/or “make it work”.

I don’t know if it’s the same for everyone, but I feel like certain rooms in our house embody our style better than others. The rooms that feel the most “us” are probably the Art Room, the Library and the back porch (or at least what the back porch will one day become). Others are a constant struggle, like the living room and dining room.

those green chairs are so gone, and we added a little something-something to the wall

desperately in need of paint, a new chair, desk surface, and maybe a new curtain

The Art Room is very, very slowly shaping up. I didn’t really touch on it in this post, but it pains me to work on this room sometimes, since I don’t get to actually use it as my office every day. In spite of that, I’m trying to make it a space that makes me happy, both because I spend a lot of time in it (granted, usually with my head in the Closet Office blogging) and because it’s visible when you walk down the hallway.

I am drawn to a variety of styles, and sometimes it takes me a while to figure how the best way to mesh everything together. Fortunately with the advent of Pinterest the direction of the room seems to have gotten clearer (or maybe I’m just more confident in that fact that my ideas are not completely wacky).  I am still smitten with Sara’s art room, but I also pinned a bunch of fun, colorful, slightly rustic rooms on my Art Room Inspiration board.

Curbside Chair

A while back we found this chair in a neighbor’s trash and painted it yellow. Since then I had Robert spray paint it a brighter, more golden yellow (that coincidentally matches our curtains perfectly, though I didn’t even have the fabric when we picked the paint). I know that I could have spent a lot of time sanding it down, staining it, and giving it a nice glossy coat of poly, it would have had a very nice Chilton Academy-esque look to it, but it was destined to replace another curbside chair in front of the rolltop and I thought that would have been too much wood.

For the Ikea Jonas desk we are working on a chair that is very similar to the Emeco Navy Chair With Wood Seat, which we were lucky enough to get from my dad’s garage a while back. The Closet Office will get another chair we found in the neighbor’s trash, which we hope will look like this Pottery Barn chair when we are done with it (though we may not stain ours quite that dark).

from Flickr; pinned here

Ironically, the walls in the Art Room are almost completely bare (aside from the shelves we added a while back). Fortunately browsing Pinterest often reminds me of things I’ve wanted for years but then chalked up as never-gonna-happen and tried to forget about. Most recent example: pulldown maps. I have wanted one of these maps pretty much ever since watching Sleepless in Seattle. (“Look, one, two, three, four, there’s like twenty-six states between here and there.”) After seeing the above (and several others) I decided I finally needed to make it happen, so we ended up buying one on eBay (similar to the US map here).

seen on Design*Sponge; pinned here

Also, after seeing a lot of fantastic linen and burlap pinboards I remembered seeing a pinboard made with a coffee bag a while back. Fortunately Google came to my rescue, and a few minutes later I had found the Design*Sponge post I was thinking of, and also ordered a coffee bag of my very own from Etsy.

I should have an updated design board, pictures of the pulldown map, yellow chair and maybe the Emeco-lookalike for you tonight, as Robert will be in class late.

 Anyone else drawn to several different decorating styles? Or want to paint something like clouds in your childhood bedroom?

September 8, 2011

Budget Cuts

by Cait

Generally speaking I try to shy away from talking about budgeting here. The last time I wrote at length on the subject was March, shortly after Robert switched companies. It’s not so much that I’m uncomfortable talking about money (although I kind of am sometimes; I always feel like my comments come off as judging other people on how they spend their money). It’s hard to keep in mind that everyone spends their money differently when talking about budget. The “simple” ways that a lot of people cut back in order to make up for a loss of income just don’t work for us. We can’t just go “Well, I guess I’ll stop getting my biweekly mani/pedi & give up my cup-a-day Starbucks habit, you can give up your gym membership, and together we’ll stop going out to dinner & a movie weekly and skip our vacation” because we don’t really do any of those things to start with.

Robert and I often find ourselves reminded of the fact that we may not be like most couples. We don’t go out to dinner very often, we haven’t seen a movie since a spontaneous decision to see The Men Who Stare at Goats (when it came to a small theatre that sells pizza and beer in 2009). Robert doesn’t go to the gym, I have never gotten a manicure in my life, and when I buy coffee it’s $1.12 mug refill at Einstein’s. Of course that doesn’t mean we are hoarding our money, it just means we choose to spend our money in different ways. We love our house (working on it & buying things for it), we love food, and occasionally I go a little retail crazy. (Especially when the seasons change and new cuter stuff comes out. Though to be honest, when I say “retail crazy” I mean I shop sales at places like Target & Old Navy and I spend about $100 total. Last year I bought the sweaters I mentioned in this post and the boots I mentioned here.)

Over Labor Day weekend I “splurged” on a pair of gray pants from American Eagle. They were 40% off with free shipping. Unfortunately a lot of women my size had the same idea, because when I checked on my order yesterday I saw it had been cancelled (without so much as an email to tell me “sorry, we ran out of your size even though we said they were in stock when you ordered”).  I tweeted (did you know I am on The Twitter?) to vent my anger/disappointment and had a brief conversation with Kim at NewlyWoodwards.

Then earlier today I tweeted to say I was planning to go buy a sweater at Target after work.

After a long Twitter conversation with several other bloggers about boots, I started making a list of things that make me happy this fall. Which somehow morphed into a list of things I wanted to buy this fall (with the exception of my boots from last Black Friday). And honestly I was ok with that at first. Then I saw Amanda at Our Humble A{Bowe}d’s post about their kitchen plans, which made me think about our guest bath and everything left to buy for that. At that point I stopped thinking about fall clothes (mostly) and tweeted this:

While standing in Target clutching the sweater I wanted I came to the conclusion that I need to chill out with spending for a while. Even $1.12 for coffee or a couple of $20 sweaters can add up. Maybe I will rediscover all the fun things I bought for fall last year, and we have plenty of smaller projects we can work on while saving up for the bathroom. (I really, really would like to use our new tub soon.)  I dejectedly put the sweater back and came up with a few goals for this fall.

Oh and I made one more small change.

I change the dry-erase label on this jar pretty frequently.

How do y’all encourage yourselves to save up for big projects?

Tags: ,
August 31, 2011

Hip to be Square

by Cait

I don’t know how many of you work in a cubicle every day, but for me 40+ hours a week in at a drab desk with standard-issue tan cube walls makes me just a little bit crazy. It also makes me a little bit jealous of all of those full-time bloggers, freelancers, business owners and telecommuters. I had to stop reading Apartment Therapy because I couldn’t take seeing one more pretty office. My little cube just couldn’t compete.

It’s not like I haven’t tried to dress the place up a bit. I added fun accessories to my desk, changed my computer background to something cheerful, considered getting a plant for my desk (and then a faux plant, after I killed all the real plants in our house). It worked for a while, but then one day when they were working on the front office building at work I walked out of my window-less cube in the back of the warehouse to see this:

did someone order a pallet o’ West Elm?

Yes, that is a pallet of West Elm Parsons Desks. There was also a smaller stack of tables. It might have been the most beautiful thing I had ever seen if I wasn’t so busy being jealous and enraged.

I tried to forget about it. I tried to focus on working, and spend my time away from work making our house into the kind of inspiring space you see splashed across decorating magazines and blog house tours. I tried to tell myself I didn’t even want a Parsons desk (“Where would I even put things? There’s hardly any drawer space!”) That worked for a while, too. Work was work, a place where I put on blinders and tried to pretend I didn’t spend almost every waking second thinking about paint colors, fabric swatches, furniture and design boards. A coworker and I dubbed the recently completed front office building Swankyville, and I vowed never to go there. Even after hearing the rumors about coffee that wasn’t 40 cents a cup . And especially after learning that my ID badge won’t even open the door to Swankyville!

Finally one day I had a reason to go over to Swankyville. After having my coworker use his badge to let me in, I sat waiting for my interview. I allowed myself to look around at the warehouse-chic breakroom, with its matte black ceiling, dark furniture, and stainless appliances. Just for a second I imagined myself working in the surrounding offices and far nicer cubicles. I even snapped a terrible iPhone picture (which it came out horribly blurry, thanks to the glare from the freaking atrium with picnic tables and the idea of being caught being that girl who takes pictures of the breakroom).

I spy with my little eye, a lot of West Elm furniture.

Since the photo came out so poorly, I threw together a quick design board with the furniture (and vases, which are not pictured) they used.


West Elm Overlapping Squares Bar Stool; West Elm Scoop-back Bar Stool; West Elm Klismos Dining ChairWest Elm Round Dining Table with Cutout LegsWest Elm Hive Vase

Back over in… whatever the opposite of Swankyville is, I looked around my cube. Maybe I don’t have West Elm furniture, maybe I won’t be working in Swankyville, and security sure as heck won’t let me in the building with much else to spruce the place up with (they give my paper bag the stink eye daily), but I can probably at least pull off CB2 chic. Even if I am on more of an Ikea, Target and Amazon kind of budget.

Aladdin To-Go Tumbler Clear; Ceramic Greek Coffee Cup; Black & Decker 5 Cup Coffee Maker; Tape Dispenser; Red Swingline; San Fran Tumbler

I have tried to deck my desk out with fun pops of color to keep me sane during the work week. A few of them have been on my desk since I started this job over two years ago, like the ceramic Greek coffee cup, my red Swingline, and my cassette tape dispenser. I added a plastic tumbler (similar to the San Fran one, though mine actually has leaves on it) as a  pen cup. My mom gave me a heart-shaped box made from recycled magazines, and I thought it would be a cheerful reminder of home, so I use it as paper clip holder. Up until a recent company email preventing us from having coffee makers I had this Black & Decker 5 cup on my desk, which got me through a lot of overtime last year. Since I have to bring (or buy) coffee now, I thought an Aladdin tumbler like this one would be nice for the tail end of summer and iced coffee (I haven’t actually decided which one I want yet, I might just buy whatever I find at HomeGoods).

Other than the things pictured, I just try to pick up things I think are cute (and usually cheap). I have a little Florida license plate with my name on it, the VW that popped out of one of my car’s center caps a few years ago, some pins with funny sayings, a small yellow desk fan.

What do you keep on your desk (at home, or the office)? Anything other than basic office supplies?

PS- I’m sure this post sounds like I hate my job. That isn’t true. I’m thankful to have a steady income, and a job where I get to use some of the skills I went to school for. Is this the job I want to work the rest of my life? No. But I do feel fortunate to have a job, even if it’s one that makes me want to strive for more.

August 29, 2011

The Spanish Steps

by Cait

To break from the hurricane talk for a minute, I thought I’d share some details on a project we took on last week. I’ll have the rest of how we prepared for the high winds we were expected to have, as well as the rest of our tile project for you later this week.

We live in an area where it’s pretty common to see Spanish tile on houses, and we recently took the plunge and ordered some. I had been pinning Spanish tile designs and tiled steps to my Curb Appeal board on Pinterest for weeks, and we figured it was time after recently visiting St Augustine & also seeing quite a few tropical vacation photos featuring Spanish tile. I had done some research as far as where to buy tiles that were pretty & reasonably priced, and  when one of those websites offered free shipping we decided to order our tile.

Before we finalized the decision on which tiles to buy I did a couple of Photoshop mock ups of what our front steps would look like after we tiled them. It was probably an unnecessary step, but I’m a Photoshop nerd, and sometimes it helps Robert understand my ideas.

First this one:

And then, when we decided to take advantage of free shipping from another website with different tile options, I made the one below.

We also toyed with the idea of doing one design per step, like the mock up below.

We ulitmately decided that we liked the second mock up best, so we measured to see how many tiles we would need and placed our order.  We also measured around our front door and ordered some tiles go go around that.

A few days later our tile arrived and we got to work laying them out to see what pattern we liked best.

As far as attaching the tiles to our steps, we figured that we would probably use something like Liquid Nails rather than trying to grout the tiles in place. And as luck would have it, in talking to my dad about the project we discovered that he happened to have a couple of tubes of adhesive he was willing to give us. Sweet!

We applied the adhesive in a 4-dot pattern on the back of each tile, then held the tile in place for a minute or so to give the adhesive a chance to begin setting. We used one tube for about 57 tiles the first day, just to give you an idea of how much adhesive you’re going to want if you decide to tackle a similar project.

The whole project probably took about two hours from start to finish, and we only cracked one tile in the process (and we had an extra) so I’d say it was a success. We did run out of adhesive three tiles before we finished the bottom step, so this isn’t a complete after picture.

We  didn’t want to cut any tiles, so we do need to figure out a solution for the slight space you can see on the left of the second step (each step has a similar space, actually). We’ll probaly end up painting that area a different color to make it blend, or add some sort of edge tile.

Also, after giving the adhesive a chance to dry overnight we ran a bead of almond colored caulk along the top edge, just to give the whole thing a cleaner look.

Anyone else added some interest to their exterior recently?

August 26, 2011

Preparing For a Big Storm: Part 1

by Cait

Growing up in Florida, Hurricanes are not uncommon. Sometimes as Floridians we even downplay the seriousness of the situation, saying things like “We’ll get some wind and rain, maybe lose power, and move on”. Recently I heard the quote “There is no such thing as a minor hurricane”, and I have to say I agree.

 My personal viewpoint on hurricanes has fluctuated over the years. Fortunately I have never experienced a full-force hurricane, but I grew up hearing stories about Hurricane Dora, which hit the area in 1964. My dad’s family moved to Florida right around that time, and my mom grew up here. When I was in middle school we had a close call from Hurricane Floyd. We were expected to get a direct hit, so we packed up and began to evacuate. After several hours of sitting in traffic on our way through Georgia the storm was reported to be turning, so we went back. I remember being terrified, and my parents and sister had to reason with me to calm me down. Even though we did not get the full force of that storm we still lost power for over a day. Also, the family photos that my mom packed into a plastic box and put them in the center of the house may or may not have stayed that way for some time. 

After that my attitude towards hurricanes became somewhat cocky. This may also have to do with the fact that I was entering my teenage years. I would still watch the forecasts like a hawk, but they always seemed to turn at the last minute. People in the area believe we are protected by the Gulf Stream, and though I never fully bought into that, I did get a bit more relaxed about the idea of hurricanes.

Then when I was just starting college at Florida State the forecast for Katrina said the storm was headed straight for us. As a category 4 or 5. Even then I was cocky. “Oh it won’t be that bad, we’ll get some rain, maybe some downed trees and lose power. We’ll be fine.” I remember even being a little flippant after the storm hit. “Florida gets hit by hurricanes all the time, what’s the big deal?” Finally, after seeing some of the pictures and hearing some of the stories, the magnitude of what had happened hit home. Ever since then, I watch the radar like a hawk, stock up on supplies, and try to prepare the best that I can.

This morning Hurricane Irene, which was initially predicted to be heading straight for us, passed by our city about 240 miles off the coast. Even with the storm that far away area beaches experienced sustained winds over 20mph with gusts into the 50s. 

I’m sure anyone who is not in the path of Irene is sick of hearing about it, and maybe those of you who are in the path are sick of it too, but I personally believe that you can never be told enough. In the case of hurricanes it’s always best to prepare for the worst and hope for the best.

image from The Weather Channel

At a minimum, The Weather Channel suggests you have these essentials on hand:

Essential Items

During a hurricane, and possibly for days or even weeks afterward, electricity and other utilities might not be available. Debris and/or water might block the roads, preventing vehicles from getting in our out of your neighborhood. Help might not reach you for days after the hurricane, so you’ll need to be completely self-sufficient during that period.

Here are some of the most critical supplies to have on hand, well before a hurricane threatens:

  • At least a 3-day and preferably a 7-day supply of water (one gallon per person per day)
  • Non-perishable food
  • Formula, diapers, and other baby supplies
  • Manual can opener
  • First aid kit
  • Prescription and non-prescription medicines
  • Toiletries
  • Cell phones and battery-powered cell phone chargers
  • Battery-powered radios and flashlights
  • Plenty of batteries
  • Extra cash
  • Blankets, sleeping bags, books, and games (especially if evacuating)

If you are a pet owner you will need to take precautions for your pets as well. This is a list from the National Hurricane Center on how to perpare your pets. And this is a list from The Weather Channel on preparing your home. 7th House on the Left also had a great post on being prepared for the unexpected.

And a few more of my personal thoughts (which may be slightly “duh” things):

  • If you are in the path of a hurricane, especially if you are in a low-lying area- get out! Prepare your house/apartment the best you can, and leave town. Take your pets with you if possible, they stand a better chance if they are with you.
  • Mandatory evacuations are not to be ignored. There is a reason they are telling anyone who ignores the evacuations to put their ID in their left shoe, and yes it is partially to scare you so that you will leave!
  • Do not drive through flood waters. Just don’t do it. Especially if there is any risk of a downed, live power line.
  • Even after the rain has stopped, there is danger from high winds and downed power lines.
  • If you are going to board your windows, use screws not nails – they are stronger.
  • Houses, cars, boats, etc can all be replaced, your life cannot. Please don’t take any chances!

We’ll be back later with another post about the things we did around the house in preparation for Irene, even after the likelihood of a direct hit had passed.

August 23, 2011

200th Post, and Guest Posting on Yellow Brick Home

by Cait

I can never think of what to say about “blogging monuments”. I know that they generally get acknowledged, but I was taking a small break from blogging when our “blogiversary” passed, and when we hit 100 posts I didn’t have much to say either.

“We are so proud of all the things we have accomplished in the past six months and 100 posts.  We had a blast doing things like writing a guest post and being featured in an online magazine.  Both were incredibly exciting and we would be thrilled to be asked to do it all again.  We would also love to do more design boards (both for us and anyone who might be interested),  and we get a big kick out of recommending paint colors for some reason (I think it’s staring at all the pretty paint chips).  One day we’d like to have an online shop, but we don’t want to get too far ahead of ourselves.

A few things we are going to avoid (at least for the time being) is advertising and giveaways. While we aren’t sure we’re in the Ad-Free Blogging camp, we have no idea who would want to advertise on our itty-bitty blog or how to go about any of that, and we usually skip giveaway posts on other blogs.”

Since then, all I can say is that I am so thankful for all of the opportunities we’ve have had to guest post in the six months since then. I would still be thrilled to have our house featured in another magazine, but that isn’t necessarily a goal of ours at this point. Mostly we just want to focus on checking things off our to-do list, and work our way towards tackling all the things we dream up for our house. I would still welcome any opportunities to help others with any design questions they may have, but we definitely undestand the pride that comes from doing that sort of thing yourself.

Having said all that, we are so excited to be guest posting over on Yellow Brick Home today! So be sure to check there for another one of our curb appeal projects.

And a big welcome to anyone who is here for the first time! Thanks so much for stopping by! We love new readers!

Tags:
August 18, 2011

The Blues

by Cait

Things have been hectic around here lately. A lot of working too much and coming home too tired to do a whole lot of anything in the way of projects. In spite of all that, we’re baby-stepping our way through a front porch mini-makeover this summer in an effort to improve our curb appeal and stay busy enough to keep our sanity. We already have the mailbox (a gift from Robert’s parents for my birthday), and we talked about our new door hardware and other changes we’d like to make here.

The next step in the process was to give our front porch ceiling a facelift. We’ve both been on a blue kick recently, and it’s a southern tradition to paint porch ceilings blue, so we embraced it. We started with a peach ceiling (which made the ceiling feel very low and closed-in), sporting asymmetrical trim (to hide the seams in the drywall), a HomeGoods lantern we turned into a porch light pre-blog, and far more dead bugs than I care to think about. (The photo below was taken after Robert started to pry the trim down, but there is a really old iPhone picture in this post with a true before picture.) Robert did all of the work (and took a lot of one-handed pictures),  since this took place during a period of time when I was working 58 hour weeks.

Robert pried the trim down using a razor knife & a screw driver, then added a few more screws to reinforce the drywall.

After everything was secured better he caulked the drywall seams.

Then he took down the old light and sanded the edges of the old layers of paint to help give everything a smoother, more seamless look in the end.

The first layer of spackle went up.

Followed by a lot of sanding and more spackling.

After waiting out a summer shower, he taped off the ceiling and rolled on two sample cans of  Valspar Grand Hotel Mackinac Blue (we changed our mind about the Glass Tile color after taping some paint chips to the ceiling and staring at them for a while).

Then the tape came down, and we added a new light.

All in all, it’s a cheerful addition that you can see peeking out at you when you pull up in the driveway.

I can’t wait to tackle the back porch now! Maybe we’ll wait until it cools off a little…

Edit: I saw this link on another blog (I wish I could remember which one!), and when my mom emailed it to me I thought I should add it to the post. Thanks to NPR for such a great link about blue porch ceilings.

July 25, 2011

Guest Bath Redux: Another Look at the Budget

by Cait

Remember back in April when we tried to fix a pipe that burst in the wall of our guest room, wound up discovering mold in the walls, and decided to do a complete bathroom overhaul instead? Yeah… about that. Sadly with everythig we’ve had going on the bathroom has pretty much been sealed off and waiting for us to have the time & money to tackle it since mid-May.

the guest bathroom in its former “dealing with it” stage

We haven’t done much besides gripe about how we need to get the guest bathroom back in working order think about exactly what direction to go with for the guest bathroom. I knew I wanted white subway tile and blue walls even before I found this picture on Houzz (back before Pinterest stole my heart), and thankfully Robert liked that direction a lot.

from houzz

Then the oval tub we removed during demo and put upside down in the backyard cracked on one edge. We tried to see it as a good thing, since making a solid surface tub surround would have been a pain in the neck with an oval tub. And then the second-guessing started. Did we even want a tub in that bathroom or if did we want a stand-up shower? Did we want hex tile on the floor or something more unique and unusual? Should we buy a new tub or cast one out of concrete? Pretty much the only things I never second guessed were white subway tile and blue walls.

 Last Thursday I was thinking about bathtubs (I prefer plumbing fixtures to jewelry) and looking on Pinterest when I saw the very modern Kohler Underscore. I fell in love with it for just long enough to realize that it’s supposed to retail for $1100 ($755 at Home Depot) and have a panic attack about our budget. Thankfully my good sense returned quickly and rather than resorting to desperate measures to fund our bath remodel I started searching around again. I sent Robert a link to the Kohler Devonshire ($350 at Home Depot) but neither one of us really liked the indentations around its edges. Then asked him sort of offhand if he could stop by our local ReStore to see what they had.

iPhone picture Robert sent me of the tub

Cue the heart palpatations when he sent me this picture a little while later. Someone must have heard my feeble cries for “fabulous on a budget” (to quote Jami from What The Graham), because this white tub was only $124.99 and it fit perfectly into our plan for the bathroom. I spent the rest of Thursday and part of Friday freaking out that someone else was going to buy it out from under us before he could go back, but luckily no one else was interested.

With that new addition, I decided it was about time to update the design board and reconfigure our budget tracking. We are still nowhere near ready to finish renovation, but I wanted to take a look at what we have ahead of us.

updated design board

You’ll notice that since the last design board I changed my mind on the sink faucet. I’m sure Robert is thrilled. However, he likes the tub spout I picked out, and agrees that the new faucet coordinates better. (Both from Overstock.)

I used a tub, toilet & sink that are similar to ours (tub shown is by Kohler, toilet by Glacier Bay, but the sink was something I Photoshopped together using one by St Thomas Creations and one by American Standard). Our sink is by St Thomas Creations, the tub is by Aquarius Bathware and I can’t remember the brand of our toilet (Zeus maybe?), but they’ve both been discontinued.

The sconce is from Lowe’s, and is similar to this one from Pottery Barn. The mirror was a HomeGoods purchase from right about the time we started the blog, but I’ve seen the same mirror at Pottery Barn, on Amazon, and possibly on Overstock.

Not pictured on my design board are the shower diverter escutcheon I ordered from Period Bath, and the shower diverter handle and faucet handles with escutcheons that I scored on eBay. We splurged on the shower diverter escutcheon, but I think we made up for it with our eBay finds. Period Bath has great customer service and quick, shipping, but it would have blown our budget our of the water to buy the other pieces from them, too.

shower diverter escutcheon and my eBay finds

Costs Thus Far:
Shower Arm: $22.99 (eBay)
Sink: $20 (local home renovation outlet)
Shower head: $25 (local home renovation outlet)
Toilet: $149 (local home renovation outlet)
Mirror: already owned (HomeGoods)
Shower Diverter Escutcheon: $65 (Period Bath)
Vintage Porcelain Faucet Handles with Escutcheons: $20 (eBay)
Shower Diverter Handle: $5 (eBay)
Bathtub: $124.99 (ReStore)

Total:
$485.02 (that includes sales tax and/or shipping)

I mentioned last time I did a budgeting post that we had spent about $326 thus far. I’m not sure if I factored that with or without tax&shipping, so I added everything again (minus the faucet spout and the metal cross handles, since we’ve changed our minds about using those) and then factored in the bathtub and a few other smaller things that we hadn’t purchased yet the last time.

Still to Buy:
Tub Spout: $40.99 (Overstock)
Sink Faucet: $159.99 (Overstock)
Sconces: $17.98 (x2; Lowe’s)
Recessed lights
Curtain rod
Tile (walls & floor)
Caulk & grout
Drywall & green board
Paint
Tape & mud
Insulation (two rolls)

And I might be forgetting some things. Again, we’re not ready to jump back into things, but we’re hoping that when it’s all said and done we’re under $5,000. To me that seems like a huge jump from $485, but Robert points out that we have to redo all four walls, the ceiling, insulation, the floor (and parts of the subfloor), some of the electrical, and all of the plumbing (inside the walls as well as moving the toilet and shifting the sink over). I know all of that is going to add up to a lot more than I was expecting, but hopefully it will still end up being a lot less than $5,000.

I’m starting to panic again. Sometimes I think Robert is rounding up and fearing the worst about what we’re going to run into as far as unforeseen-costs, but then I look back at other bathroom redos and realize they didn’t have to demo nearly as much as we did. Robert says the ones I’ve shown him don’t count because they didn’t fully demo everything, and then he tried to prove his point by giving me a panic attack talking about his plans for the hall bathroom. Which he says he can get done for less than $700. And then it led to a “discussion” about pocket door hardware.

What about y’all? Has anyone done a complete bathroom redo, from the studs back out? So please, help a girl out by sharing the figures from your bathroom redos!

PS- We weren’t paid for this post in any way, all opinions on Pottery Barn, HomeGoods, Overstock, Period Bath, etc are entirely our own. (Although if any of them would like to help fund our renovations, that might help with the panic attacks and heart palpatations.)